In the past few days, our student José Antonio Sánchez Ramos has been cloning microcontrollers and this is what he has concluded:
Downloading and installing the necessary software
First of all, we will download the software provided by the owners which we can find on this link: Dataman Resources. Once we are there, we will download the zip file named «Dataman 48Pro+ Software«.
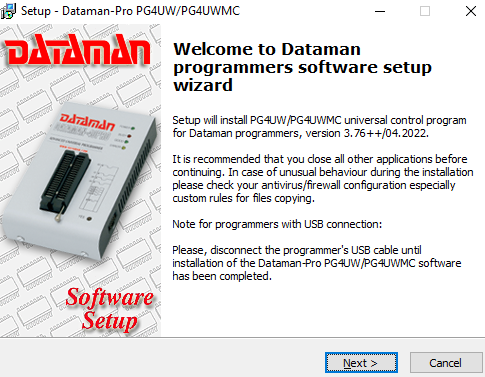
Nextly, we will look for the zip we just downloaded, in our case it is on the path «c:\Users\Granasat\Downloads\DATAMAN\» and we will open it to see what contains. After that, we will find a file whose name is «dataman_48proplus_software.exe». and we will open it.


After executing the file we can see the dataman installer has opened so we will proceed by clicking on «Next».
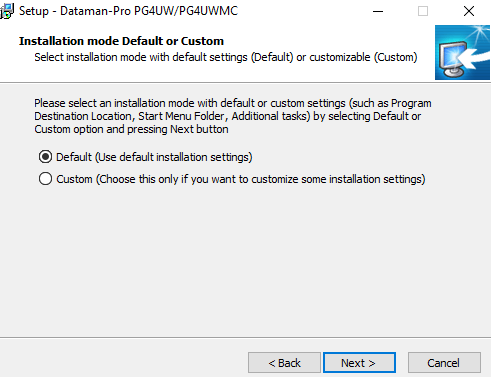
Now, the installer will ask us which type of installation we want, by default or customized. In our case, we will choose to install the program by default so we will just click on «Next».
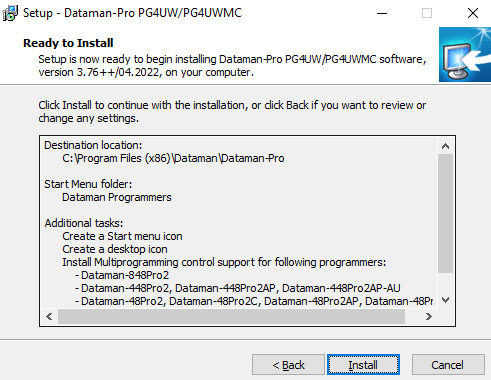
Then, a window showing the installation settings will appear but as this is not very important we will just click on «Install».
After a few seconds the setup will finish and one last window will tell us to press «Finish» to complete the installation. Now, we will be able to run the application from the desktop via a shortcut or from the installation’s folder. It is worth highlighting that we will have two executables from which we have to choose the one named «PG4UW».
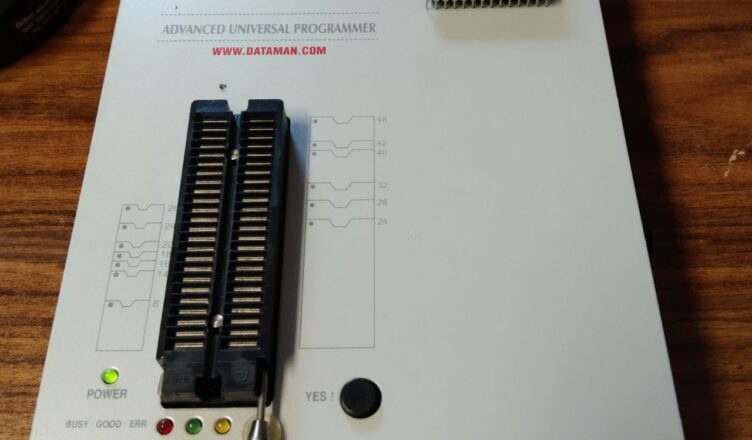
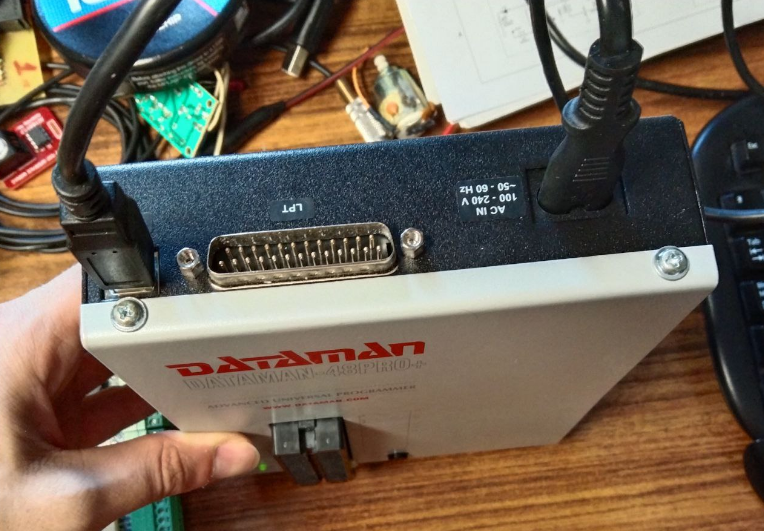
Connecting the DATAMAN-48PRO+ device
Afterwards, we will connect our device using an AC wire and a USB-B to USB-A which will be connected from the device to the PC.
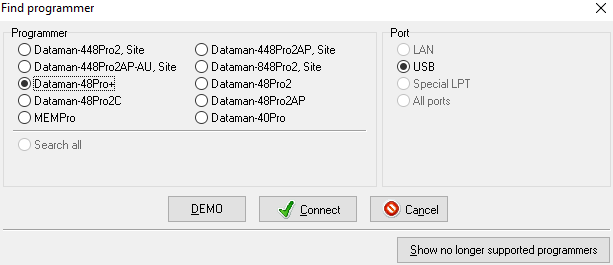
Back to the application, it will ask us to select the device and port we are using («Dataman-48Pro+» and «USB» respectively). Once we have marked the correct options we just need to continue by clicking «Connect».
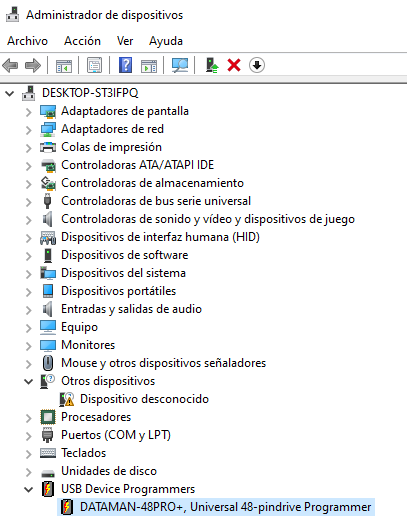
If for some reason your software does not detect the DATAMAN device on the application, you should go to the «Device manager» to check if your operative system is detecting the device. This could help you find where is the error.
Programming the microcontrollers
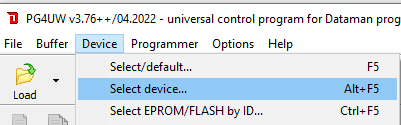
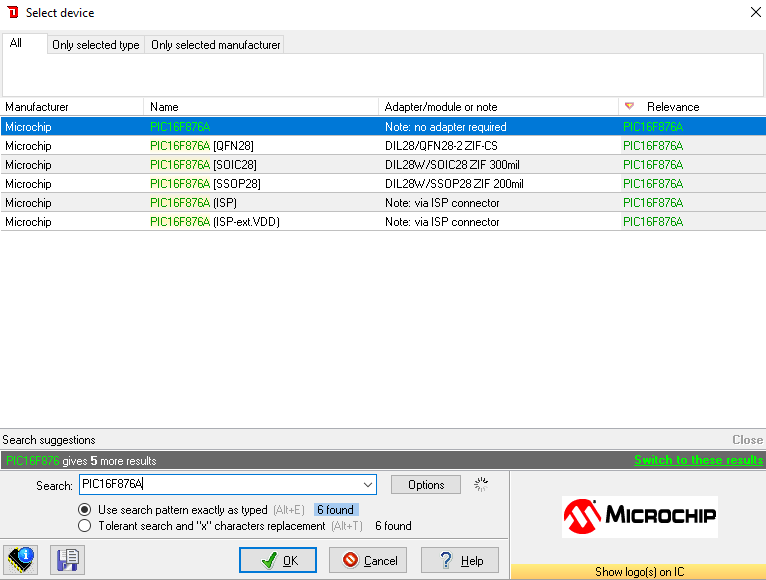
The first step to program a microcontroller is select which one we are using so we will click on the «Device» option of the application window and then on «Select device».
Then, we will have to fill in the gap with the model of the microcontroller we are using or else you will have to look for it from all of the compatible models on the list. As we are using a USB cable to connect to the DATAMAN-48PRO+ device, we will need to choose the option that says «no adapter required.
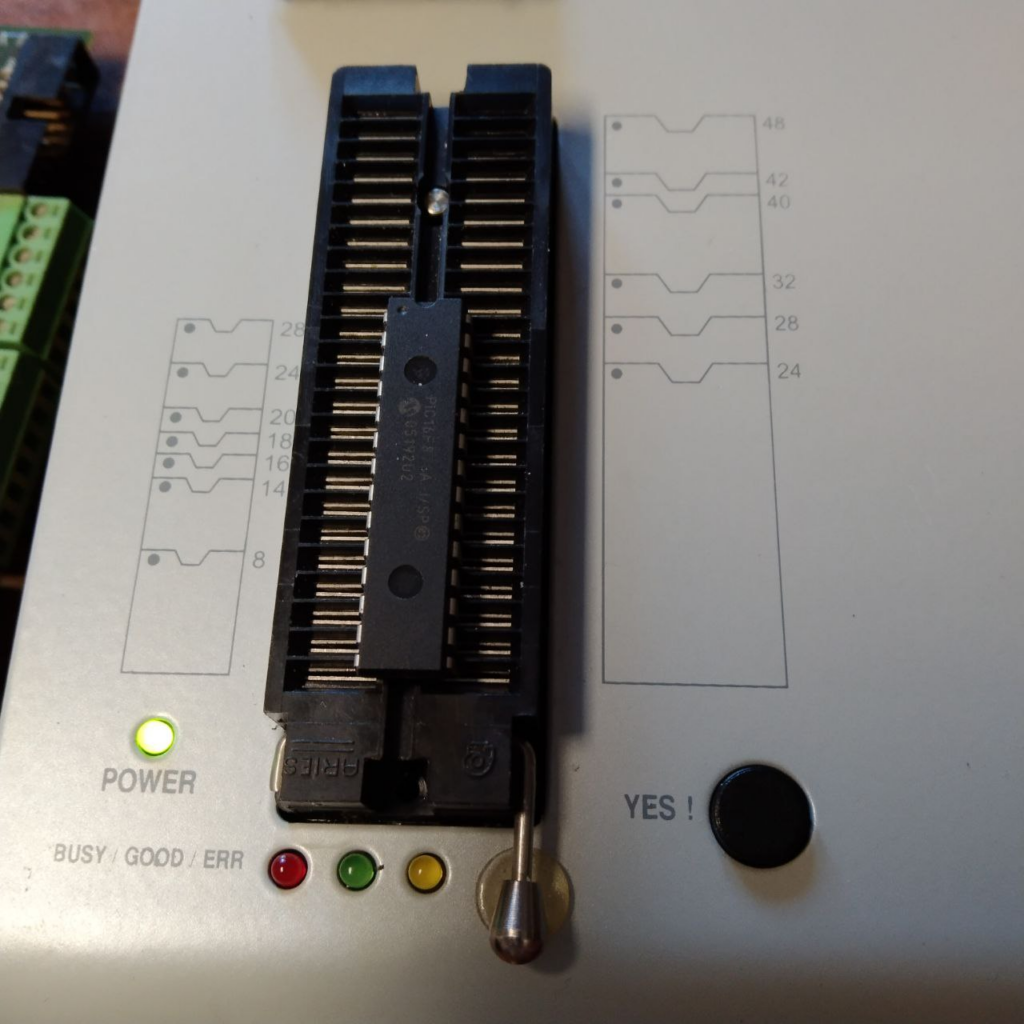
Nextly, we have to place down on the device a well programmed microcontroller on the right position which is putting the microcontroller with its notch upwards.
Once that is done, we will click on the option «Read» to copy the program loaded on the microcontroller in a buffer. Then, we need to remove the microcontroller and place down the microcontroller we want to clone.

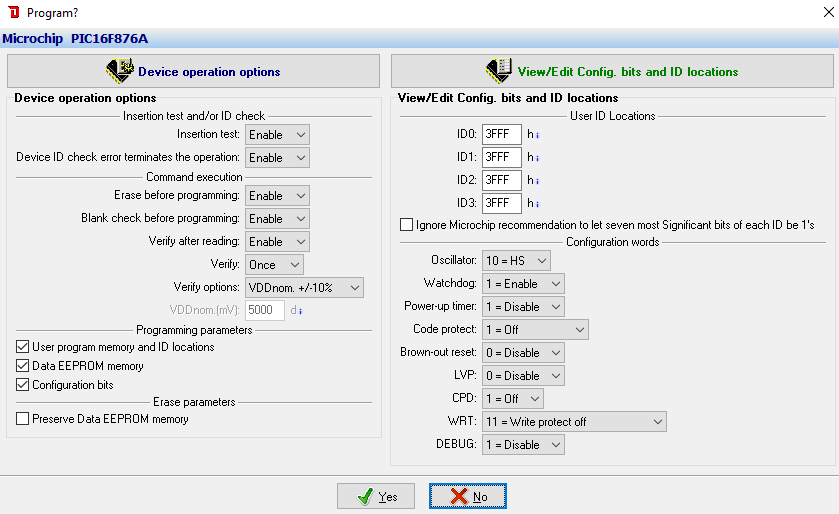
After setting the microcontroller we will click on «Program» and a window with settings will pop up. This settings are really important when programming a microcontroller because if they are wrong it will not work so here are the options we used for our microcontrollers to work.

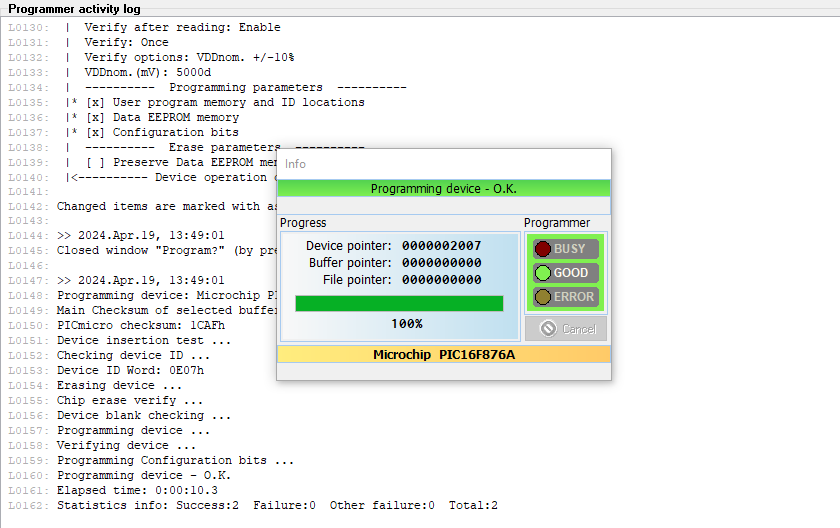
Then, we will click on «Yes» and if everything goes well we should see something like this:
Finally, we can test if the newly programmed microcontrollers work by placing them into a target device.